- HubPages»
- Arts and Design»
- Crafts & Handiwork»
- Textiles
Crochet KUHO Amigurumi Coin Purse Free Pattern

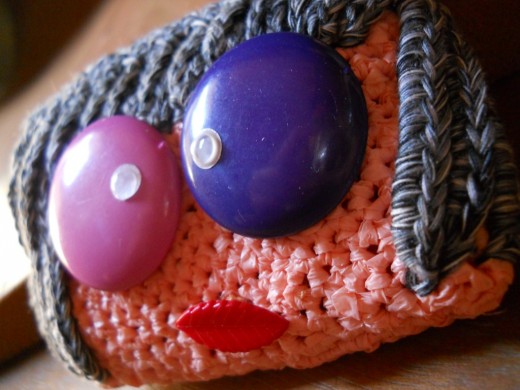
Table of Contents
-
Required Skill
-
Measurements
-
Materials and Tools
-
Project Instructions
Abbreviation
Written Pattern
Video: How to Change Color
Chart Pattern
Sewing the Button Eyes
How to Apply the Zipper
Pasting the White Spots
Cutting off my hair always brings emotional distress to me. It's like denying myself the chance to have long curly hair one more time.
The other night I cut off my own hair because I realized that I can't perm my hair if I sleep next to my baby every night.
Because I could not sleep, I decided to record my feelings in another amigurumi coin purse I named KUHO.
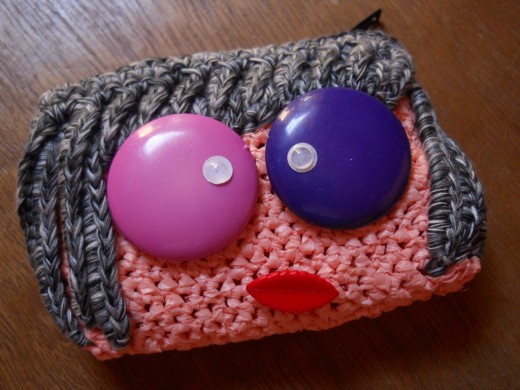
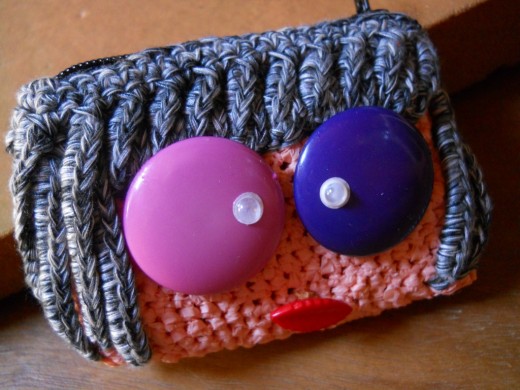
Kuho's face is done in flesh plarn with a spiral of sc's. Her eyes are two huge buttons. The white spots in the center of the eyes are paper cuttings from a paper puncher. Her lips is also a button - a leaf-shaped button. I am so lucky that button is in my button stash.
But for me, the crowning glory of this pattern is the hair. The stitch is inspired from the popping cables stitch that I found in the book Crochet Stitches: Visual Encyclopedia. I just modified it a bit to serve my purpose.


Required Skills:
- Ch, sl st, sc
- Working on both sides of the foundation chain
- Working in a spiral
- Changing colors
- Attaching stitches rows below the current row (referring to the hair stitches)
- Sewing buttons
- Attaching a zipper
Measurements:
Length - 4 inches
Width - 2.5 inches
Gauge
Face - 7 sc per inch
Hair - 8 sc per inch
Materials and Tools:
- 1-cm single strand flesh plarn
- 12 strands of sewing thread for hair
- 2 big buttons for the eyes
- 1 leaf-shaped button for the lips
- Zipper
- 1.65 mm hook
- Sewing needle, pins and thread
- Tapestry needle
Abbreviations:
Ch - chain
Sc - single crochet
Sl st - slip stitch
Sk - skip


PROJECT INSTRUCTIONS:
Crochet Pattern:
// Pattern starts
With flesh plarn
Foundation Chain: Ch 22.
Round 1: 4 sc in the 2nd ch from hook, 19 sc across, 5 sc on the last sc, (begin work on the other side of the foundation chain) 19 sc across, DO NOT turn.
Stitch Count: 47 sc
Round 2 - 17: sc on each sc, DO NOT turn.
Stitch Count: 47 sc per round
Attach 12 strands of sewing thread for hair.
Round 18: Sc, (ch 12, sl st on the post of sc in Round 2, turn, 15 sc on the ch, sk 1 sc on the current row, sc) 13x, (ch 4, sl st on the post of sc 3 rows below, turn, 4 sc on the ch, sk 1 sc on the current row, sc) 8x, (ch 12, sl st on the post of sc in Round 2, turn, 15 sc on the ch, sk 1 sc on the current row, sc) 2x, DO NOT turn.
Stitch Count: 15 long strands of hair, 8 strands of bangs and 1 sc (refers to the first sc of the round)
Round 19 : Sc on sc, (sc in ch-12, sc on sc) 13x, (sc in ch-4, sc on sc) 8x, (sc in ch-12, sc on sc) 2x, DO NOT turn.
Stitch Count: 47 sc
Round 20: (Ch 12, sl st on the post of sc in Round 3 in between two strands of hair, turn, 15 sc on the ch, sk 1 sc on the current row, sc) 12x, (ch 5, sl st on the post of sc 4 rows below in between two strands of hair, turn, 5 sc on the ch, sk 1 sc on the current row, sc) 9x, (ch 12, sl st on the post of sc in Round 2, turn, 15 sc on the ch, sk 1 sc on the current row, sc) 2x, sc, DO NOT turn.
Stitch Count: 14 long strands of hair, 9 strands of bangs and 1 sc (refers to the last sc of the round)
Round 21 : (Sc in ch-12, sc on sc) 12x, (sc in ch-5, sc on sc) 9x, (sc in ch-12, sc on sc) 2x, sc on sc, DO NOT turn.
Stitch Count: 47 sc
Round 22: 47 sc, sl st on next sc.
Break off and weave in ends.
//Pattern ends


Sewing the Lips and Eyes
Arrange the buttons until pleased.
Sew the leaf-shaped button first for Kuho's lips. Secure this button in two sc's to keep it from twisting.
Push the center of the big buttons in between the sc's such that it will stick out in the wrong side.
Turn the coin purse inside out.
Using a tapestry needle, sew the big buttons. Doing it this way gives the illusion that the buttons are glued instead of being sewed.
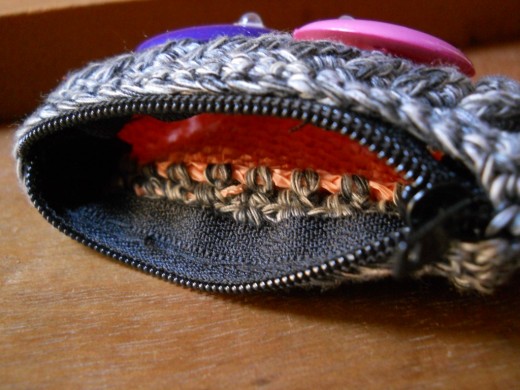

Attaching the Zipper
The zipper must be at least 2 inches longer than the width of the coin purse.
Pin the zipper in place.
Start sewing from bottom stop (refer to the Parts of a Zipper) towards the top stop, then from the top stop going back to the bottom stop. Pass the thread in between the spaces of sc's and not through the sc's. We don't want to destroy the lovely stitches.
Carrie Wolf did a really great photo tutorial on how to attach a zipper and line a crocheted purse.
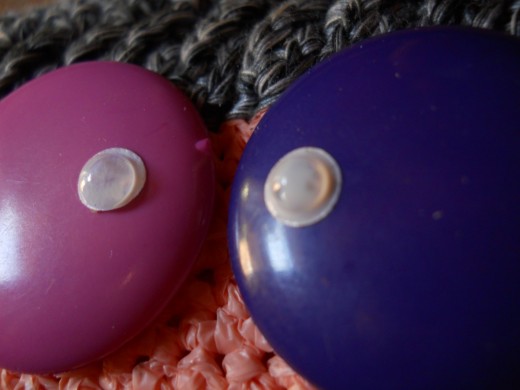
Pasting the White Spots
Paste a piece of paper cutting from a paper puncher using a glue.
Brush each white spot with glue to keep them in place as well as to protect them.
Somehow a bubble formed at the tip of my glue. I took advantage of the situation and transferred the glue bubble on the white spots instead of brushing glue on them. It made my photos more interesting, I think.